How-to
Install Picture shrinker
Install Picture shrinker from Jellyfin's own catalogue, restart Jellyfin, then choose a backup option. Picture shrinker makes the posters, backdrops, logos, photos of people and other pictures Jellyfin keeps smaller, so they take less space. This takes 13 steps and about 5 minutes, with a restart.
Before you begin
- The repository is in Jellyfin. Read Add the repository to Jellyfin.
- An administrator account in Jellyfin 10.11 or Jellyfin 12. Jellyfin installs the build for its own version.
- Restarting Jellyfin stops anyone watching for about a minute: choose a quiet time.
Steps
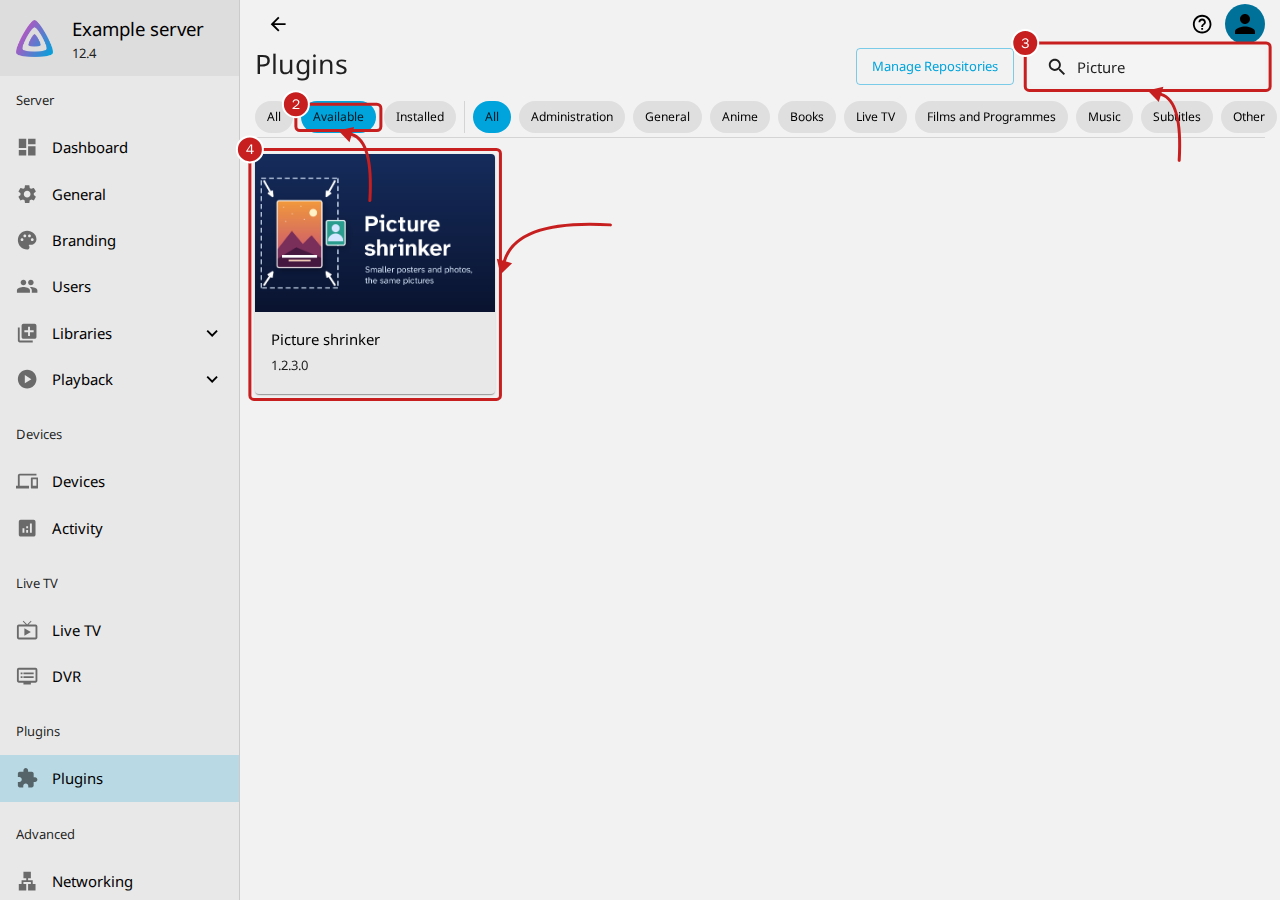
- Go to Dashboard, then Plugins.
- Select Available.
- In Search, enter
Picture. - Select the Picture shrinker card.
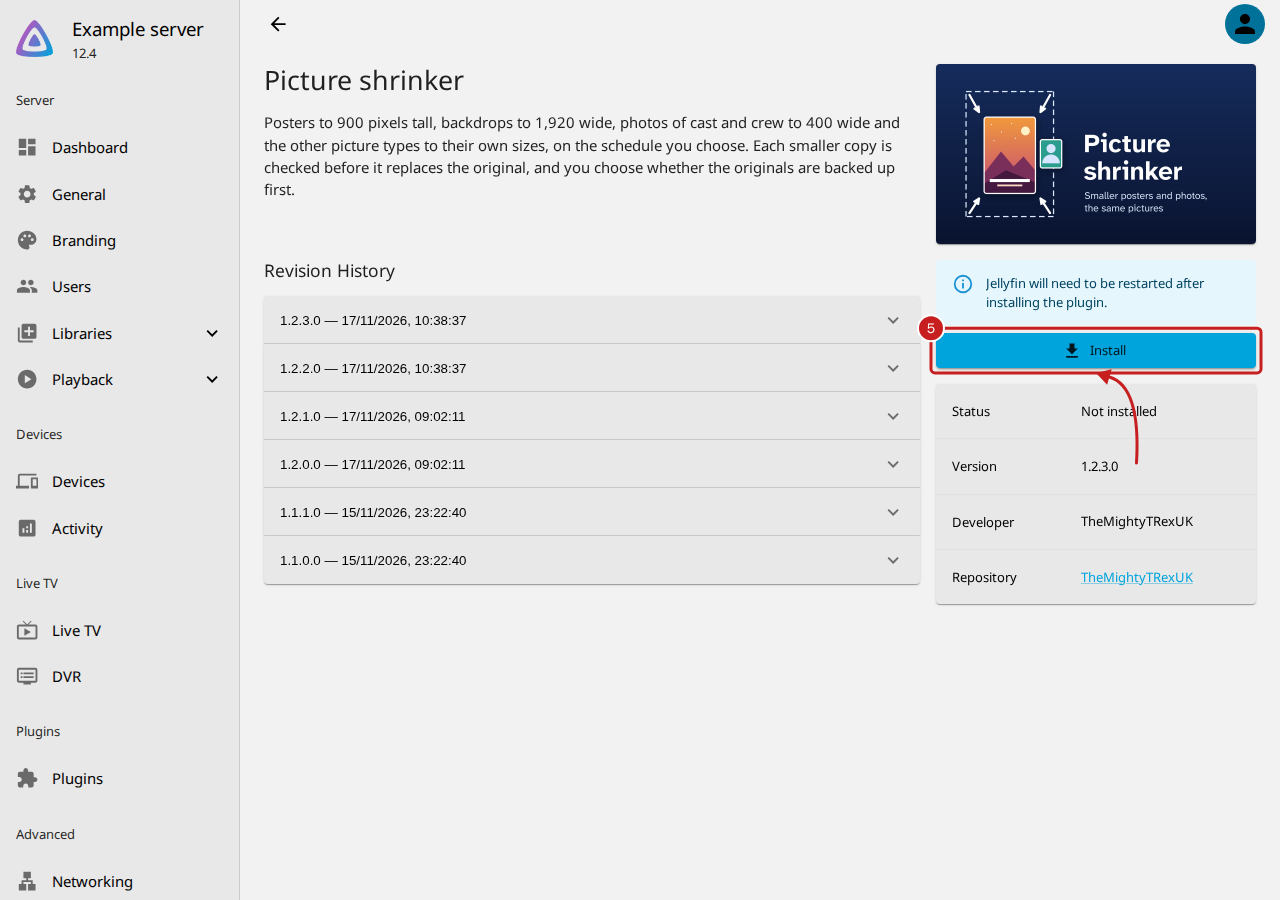
- Select Install. Picture shrinker's page says what it does, and lists each version under Revision History.
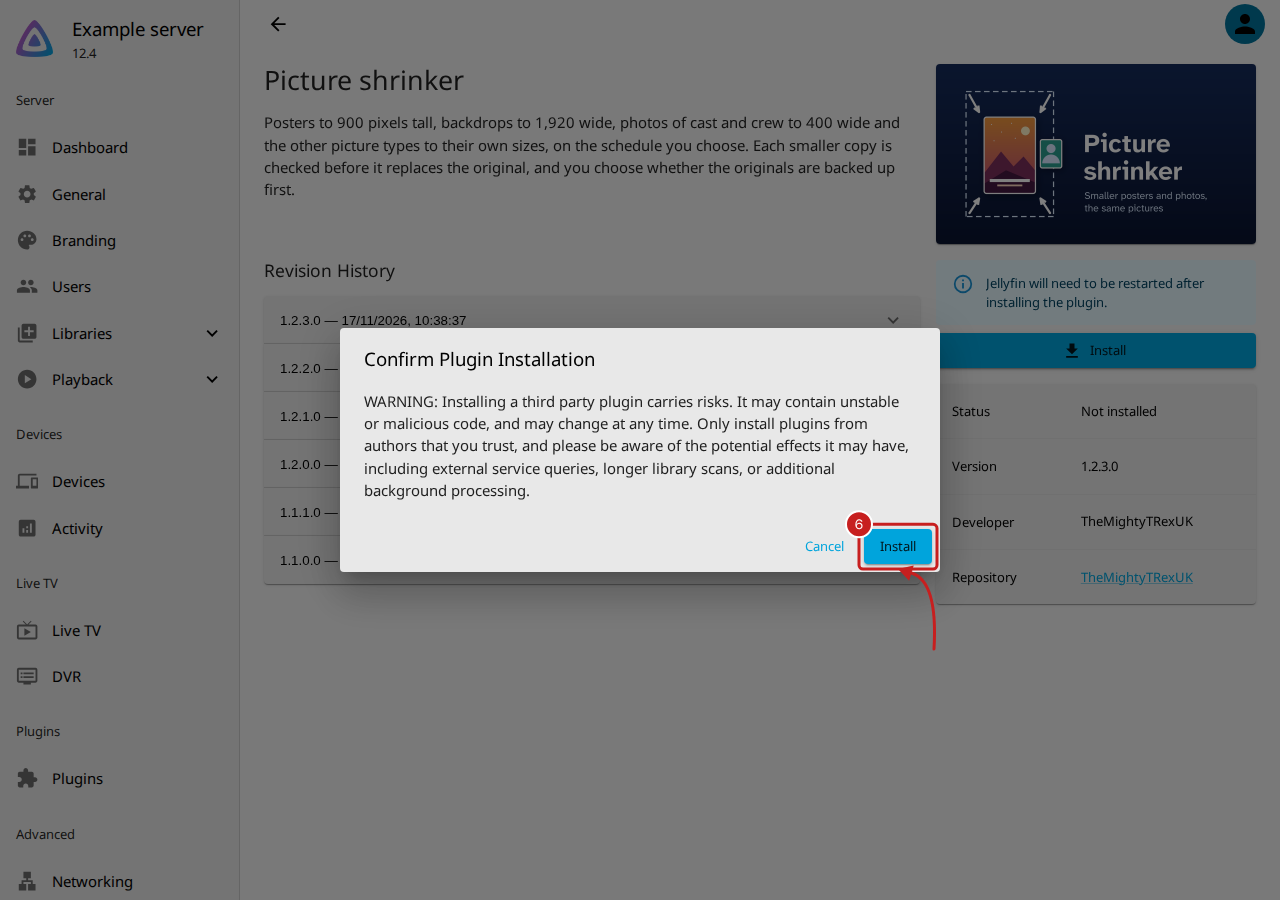
- In Confirm Plugin Installation, select Install.
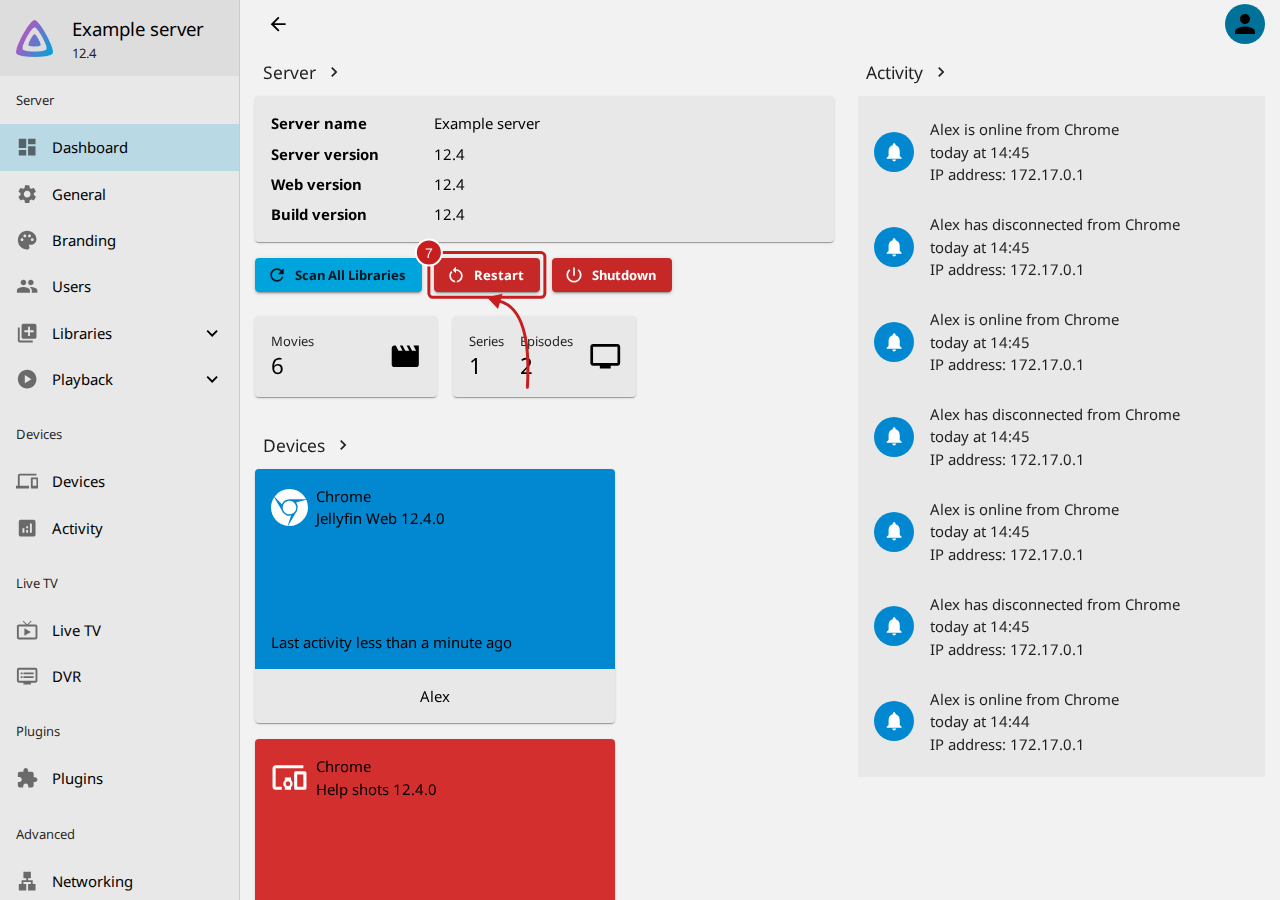
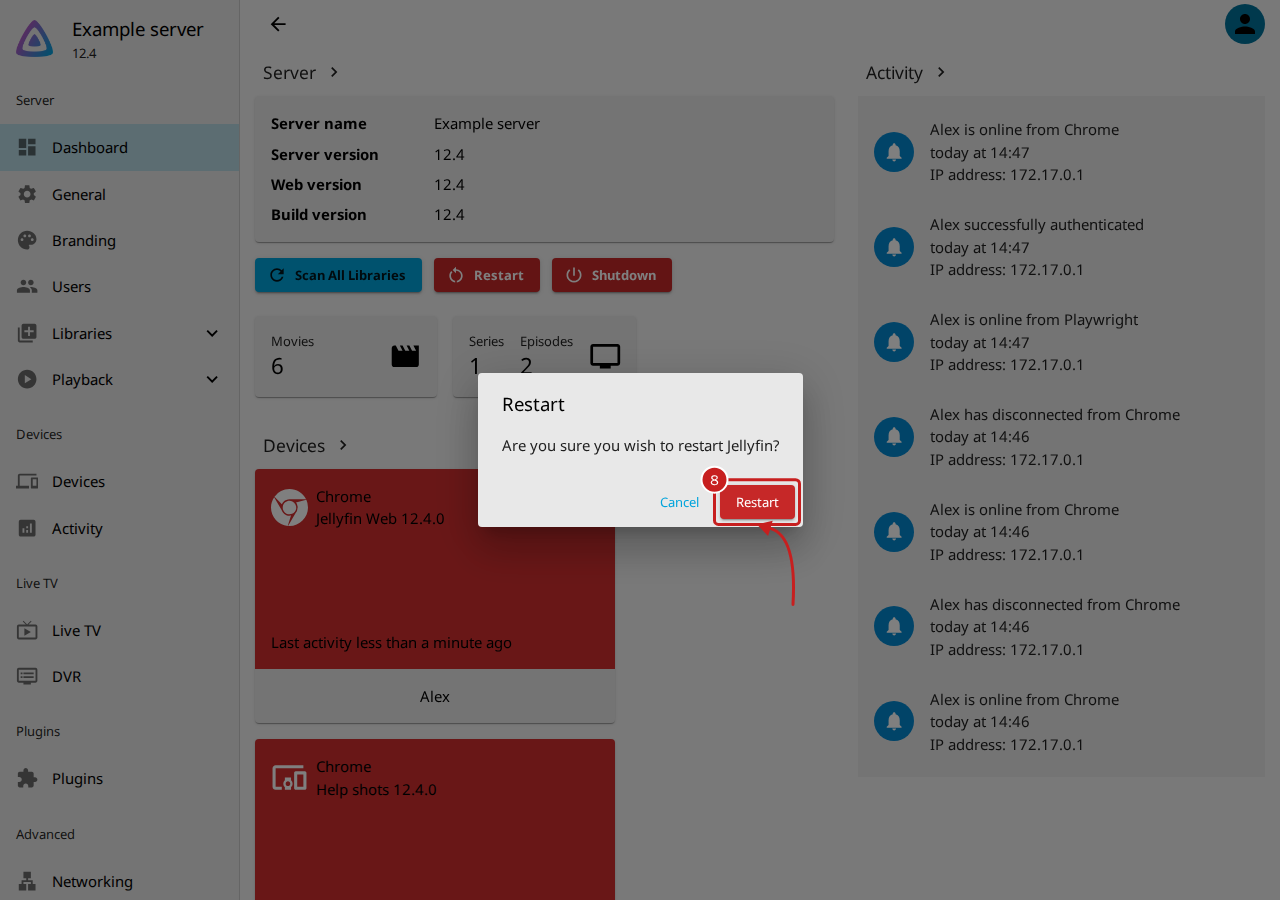
- Go to Dashboard and select Restart.
- In the Restart dialog, select Restart. Jellyfin starts again in about a minute. If you run Jellyfin in Docker, you can restart its container instead.
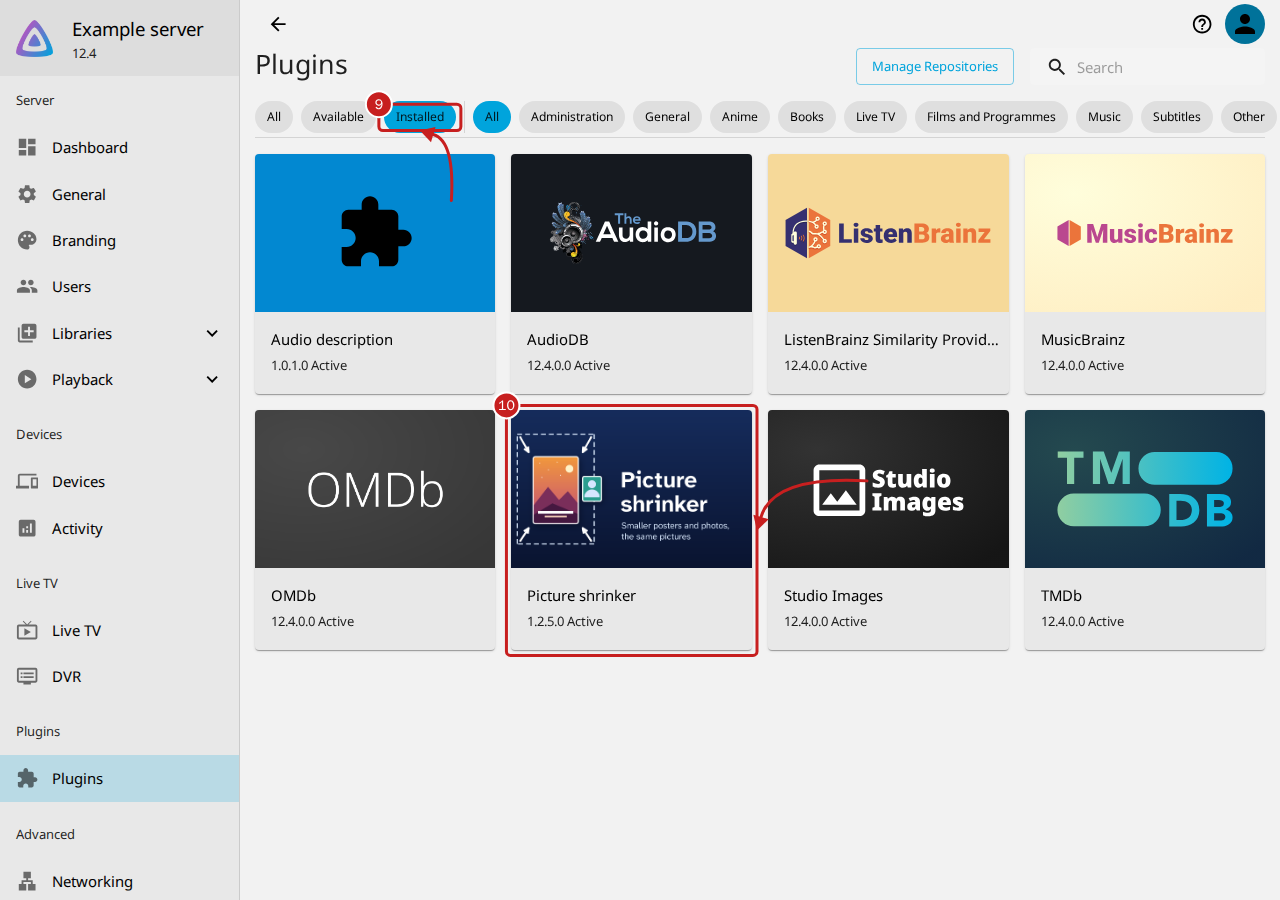
- When Jellyfin is back, go to Dashboard, then Plugins, and select Installed.
-
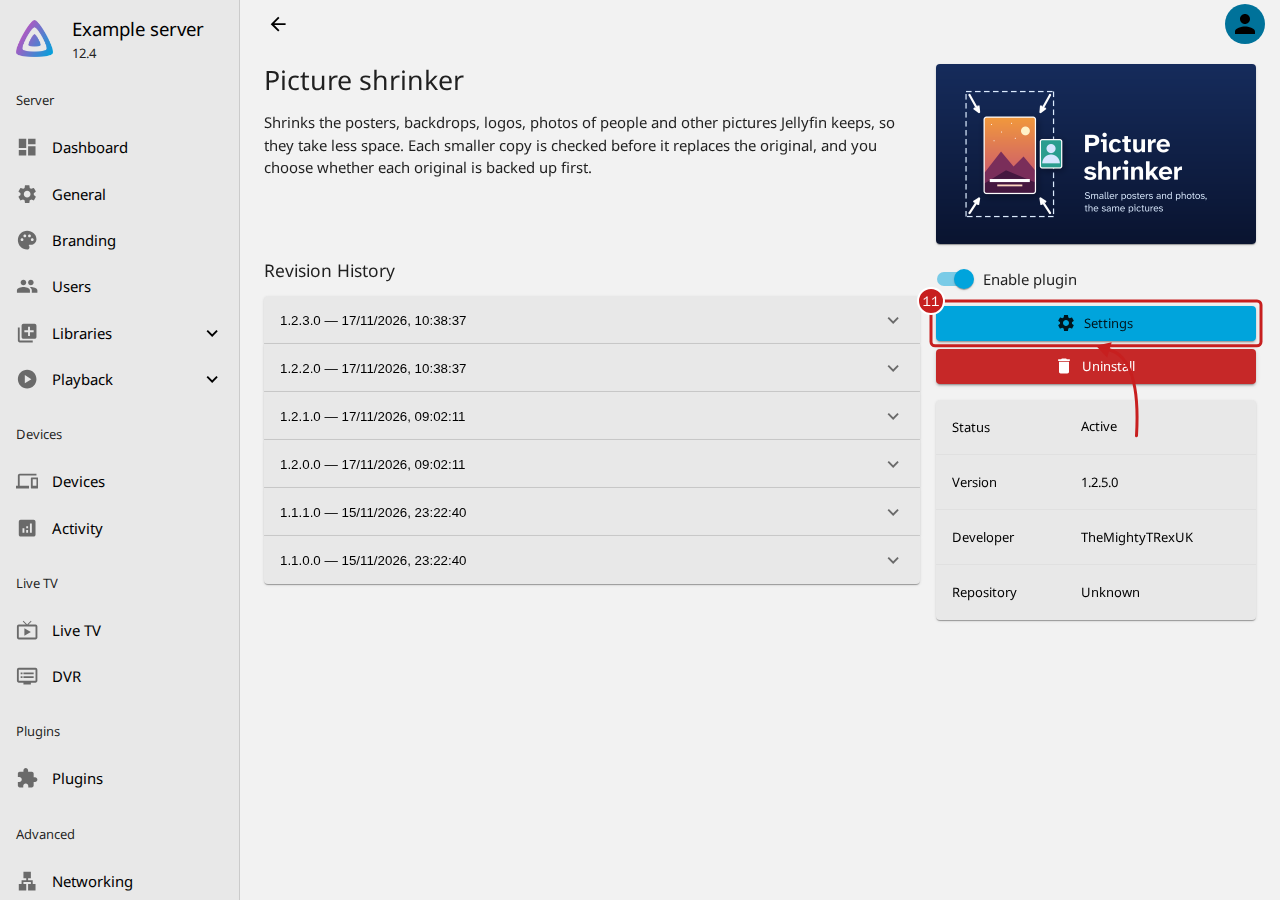
Select the Picture shrinker card. Its version and Active are under its name.
-
Select Settings. Picture shrinker's settings page opens, with a notice that nothing is shrunk until you choose.
-
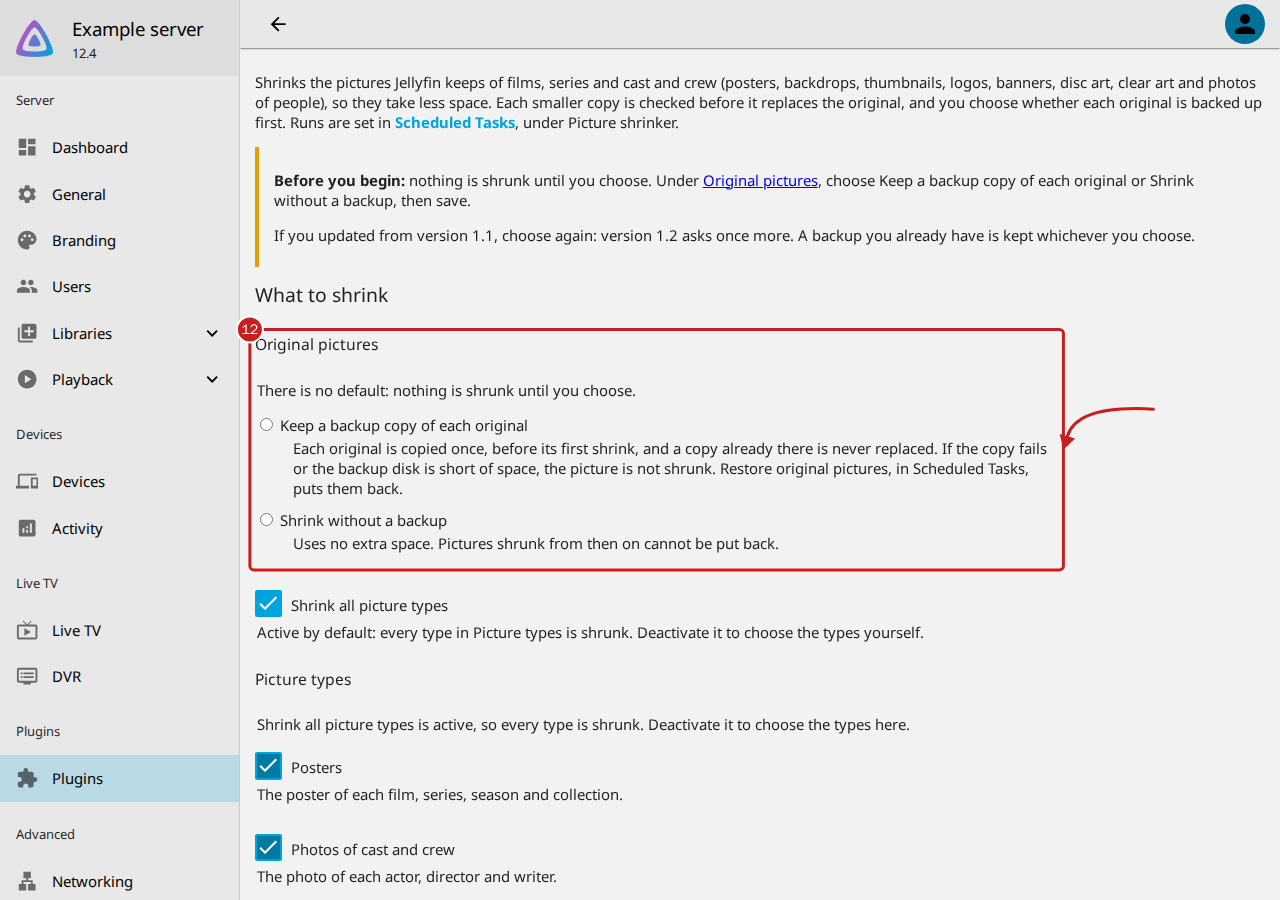
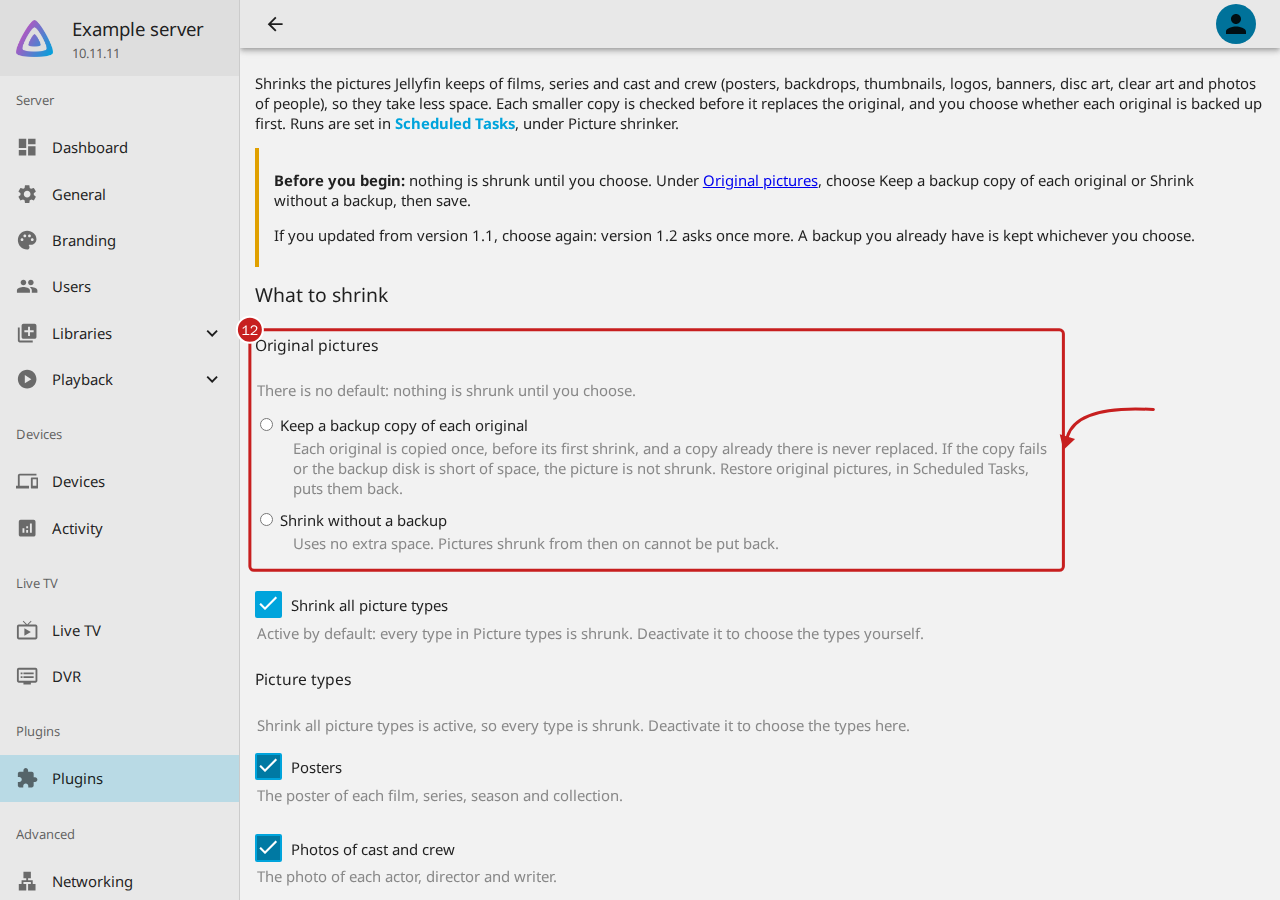
Under What to shrink, then Original pictures, choose one:
- Keep a backup copy of each original: each original is copied before its first shrink, so you can put it back. The first run needs about as much free space as the pictures take now.
- Shrink without a backup: no extra space is used, and pictures shrunk from then on cannot be put back.
The settings page is the same on Jellyfin 10.11, with the 10.11 build's version number.
-
Select Save, at the end of the settings. The page says when it saved, such as "Saved at 16:31".
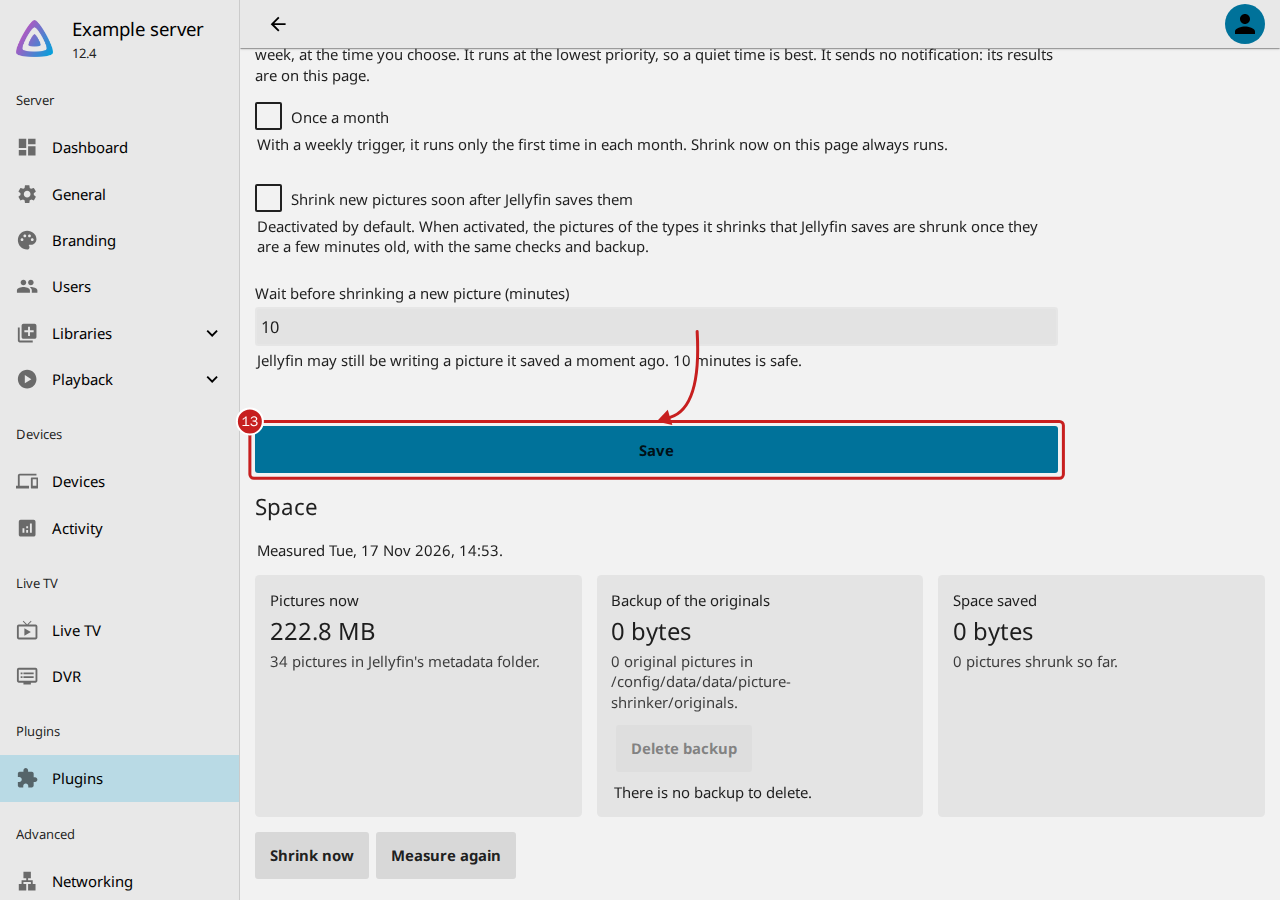
Picture shrinker now runs every Sunday at 03:30. To shrink straight away, select Shrink now under Space on the same page.
Things to note
- Every picture type is shrunk by default, to the sizes in Choose which pictures to shrink, and their sizes.
- Its two tasks are in Dashboard, Scheduled Tasks, under Picture shrinker: Shrink pictures and Restore original pictures.
- Jellyfin 10.11.11 has the same pages and names. On a Plugins page with tabs, Installed is the My Plugins tab and Available is the Catalogue tab.
- If you use Starboard, it can do these steps for you: read Use the plug-ins with Starboard.
Remove it
- To put the original pictures back first, follow Keep a backup, and put the original pictures back.
- To free the backup's space, select Delete backup on the settings page.
- Go to Dashboard, Plugins, Installed, select Picture shrinker, then Uninstall, and restart Jellyfin.
The pictures stay as they are. If you kept the backup, its folder stays in Jellyfin's data folder
(picture-shrinker/originals), with two small files of the plug-in's own: its settings,
plugins/configurations/Jellyfin.Plugin.PictureShrinker.xml, and its figures, plugins/Jellyfin.Plugin.PictureShrinker.
You can delete them yourself.
If it does not work
- If Picture shrinker is not in Available, read A plug-in is not in Jellyfin's catalogue.
- If nothing is shrunk, read Picture shrinker is not shrinking pictures.
Find out more
This page on GitHub, where the help is written.