How-to
Add the repository to Jellyfin
Add one repository address to Jellyfin, and every plug-in by TheMightyTRexUK appears in Jellyfin's catalogue, with its updates. A repository is a list of plug-ins that Jellyfin reads from the internet. This takes 10 steps and about 2 minutes.
The address is:
https://raw.githubusercontent.com/TheMightyTRex/jellyfin-plugins/main/manifest.jsonBefore you begin
- Jellyfin 10.11 or Jellyfin 12, and an administrator account. To find your version, go to Dashboard: the version is under the server name in the Dashboard's menu.
- If you added Picture shrinker's first address before, read Move from the old Picture shrinker address instead.
These steps are for Jellyfin 12 and Jellyfin 10.11.11, which have the same pages and names. An earlier Jellyfin 10.11 with tabs on its Plugins page names some controls differently: read On Jellyfin 10.11.
Steps
- Open Jellyfin in a web browser and sign in with an administrator account.
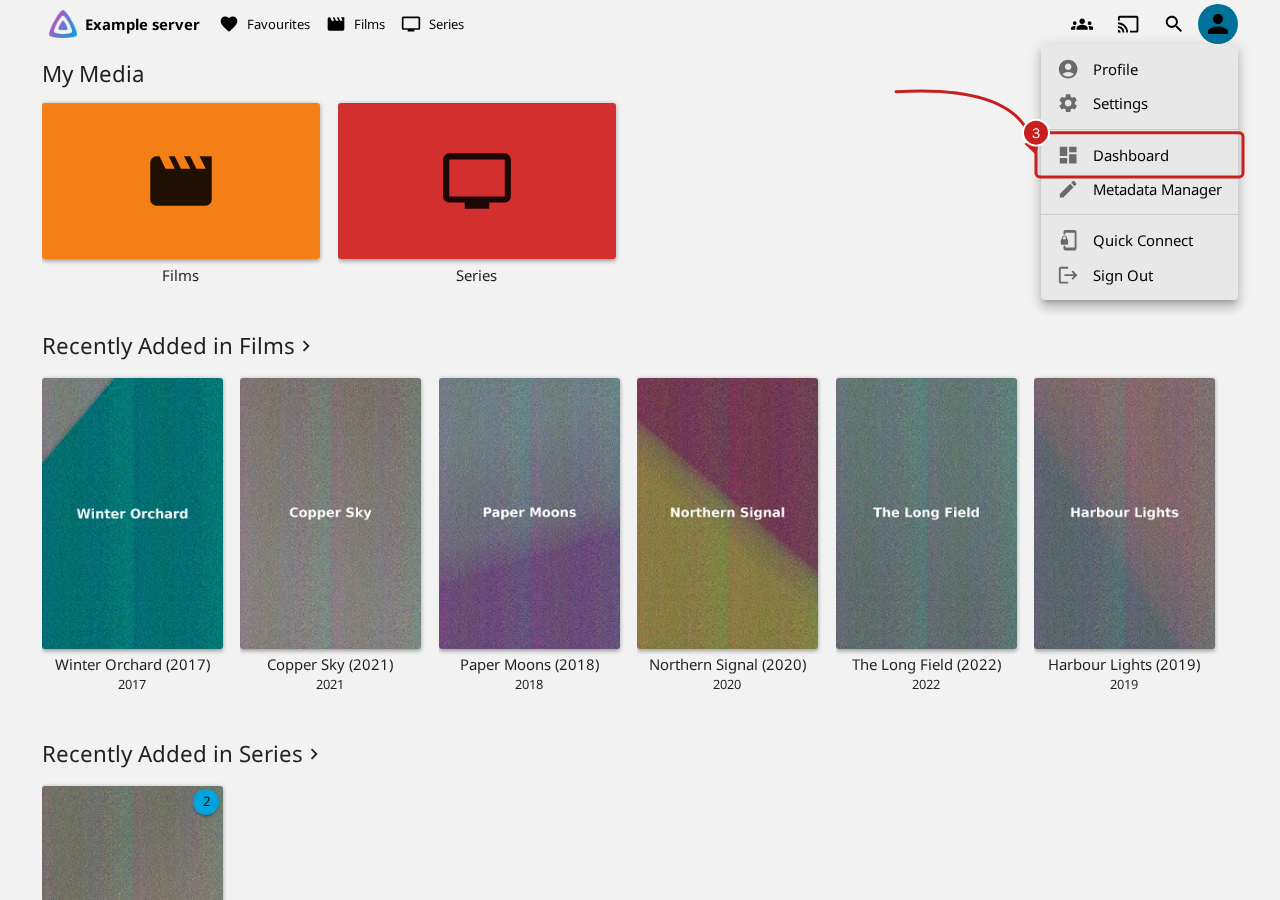
- Select your profile picture, in Jellyfin's header.
- Select Dashboard.
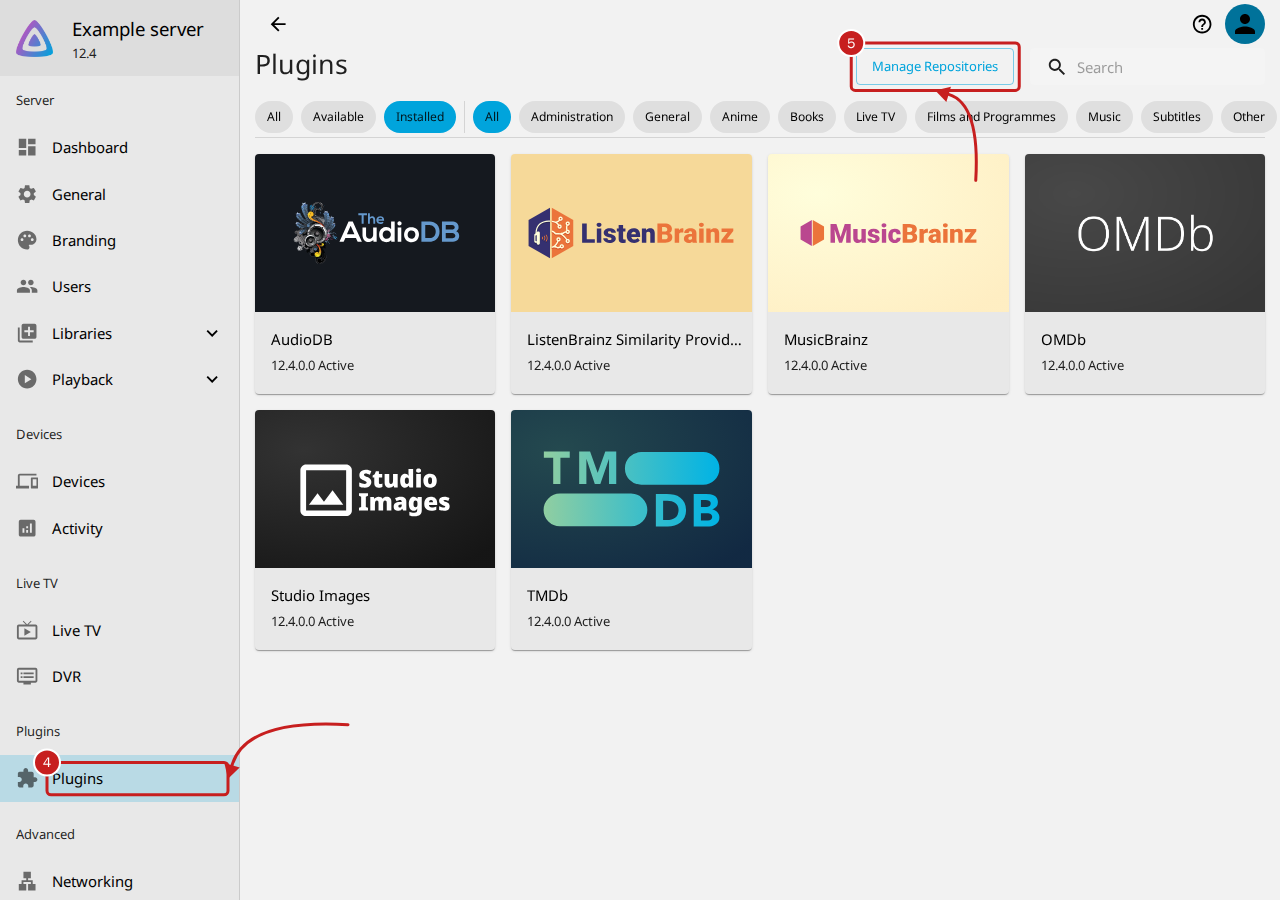
- In the Dashboard's menu, under Plugins, select Plugins.
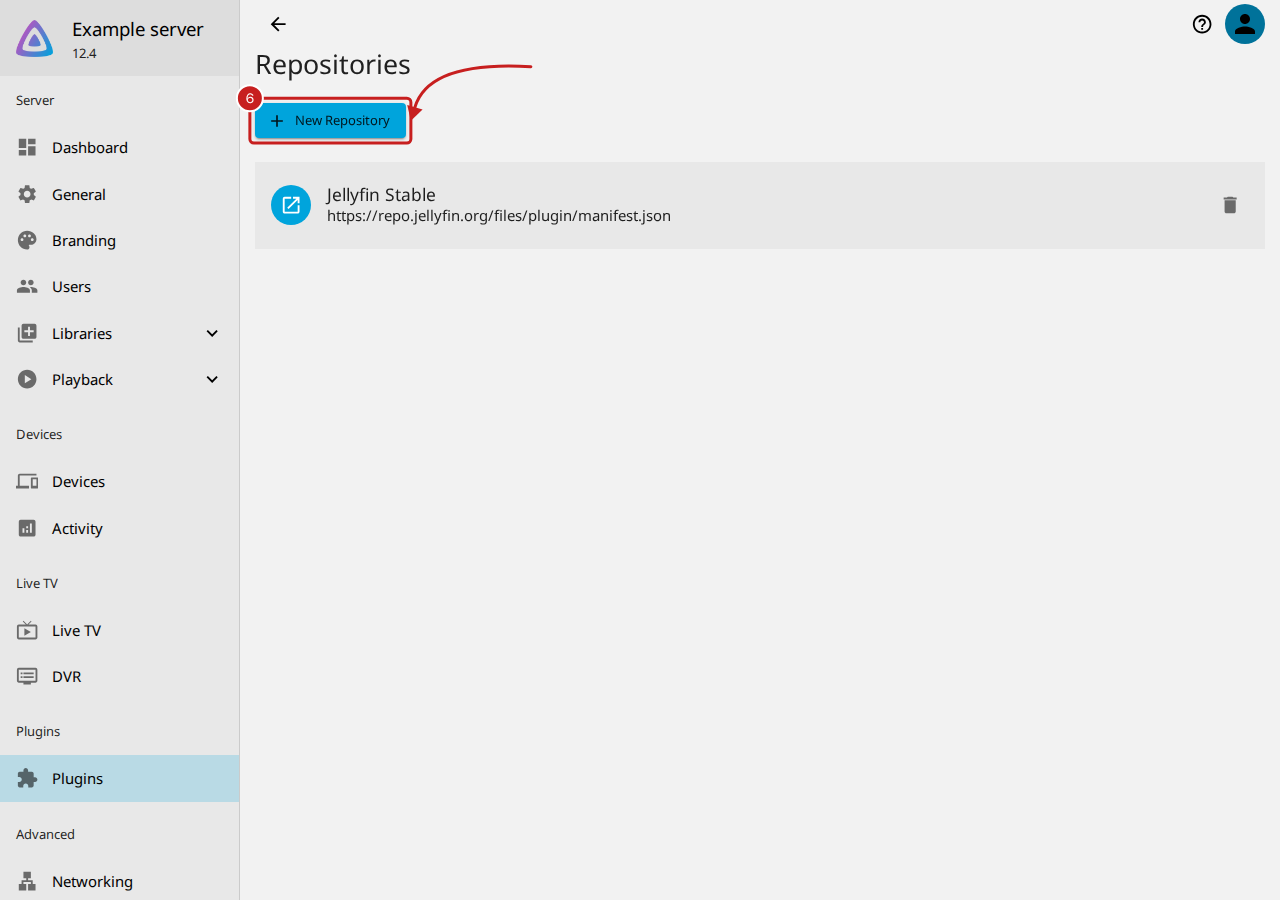
- Select Manage Repositories. The Repositories page opens, listing Jellyfin Stable.
- Select New Repository. The New Repository dialog opens.
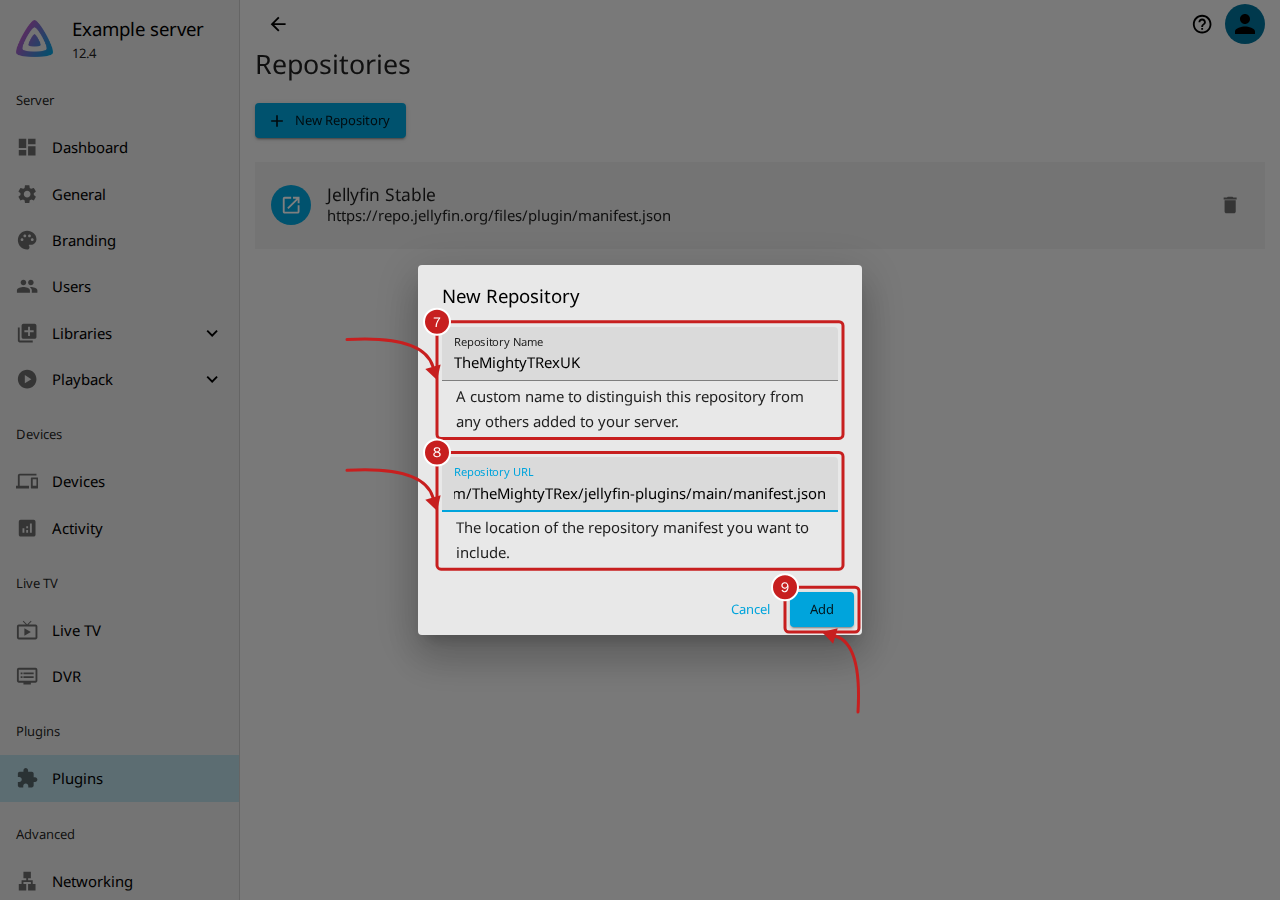
- In Repository Name, enter
TheMightyTRexUK. Any name works: it is only for you. - In Repository URL, paste the address:
https://raw.githubusercontent.com/TheMightyTRex/jellyfin-plugins/main/manifest.json - Select Add. The repository is listed under Jellyfin Stable.
-
Go back to Plugins and select Available. Each plug-in by TheMightyTRexUK is listed with its own picture.
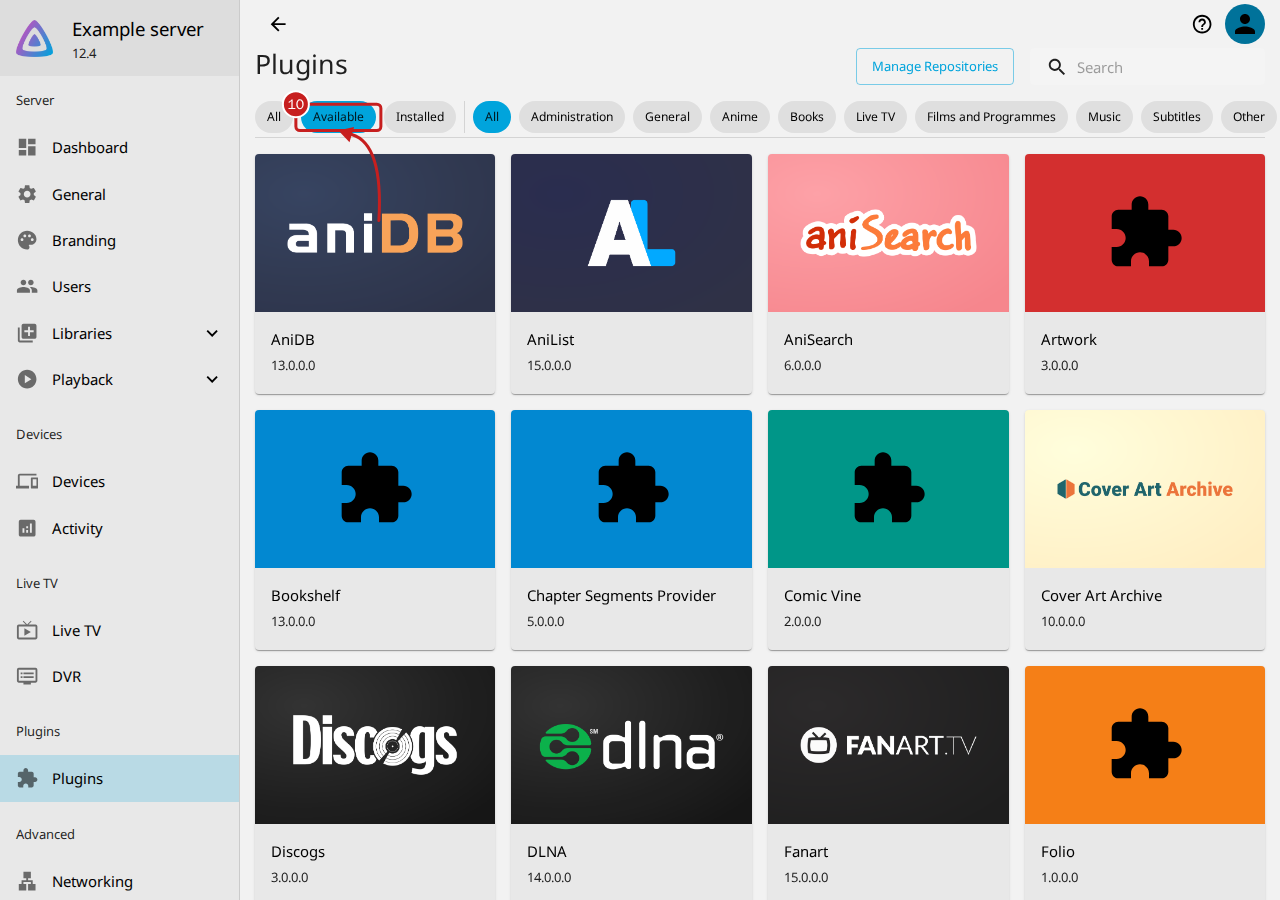
Now install the plug-ins you want: read Install Picture shrinker and Install Audio description.
On Jellyfin 10.11
Jellyfin 10.11.11 has the same Plugins page as Jellyfin 12, so the steps are the same. It lists the build for Jellyfin 10.11, such as Picture shrinker 1.2.2.0.
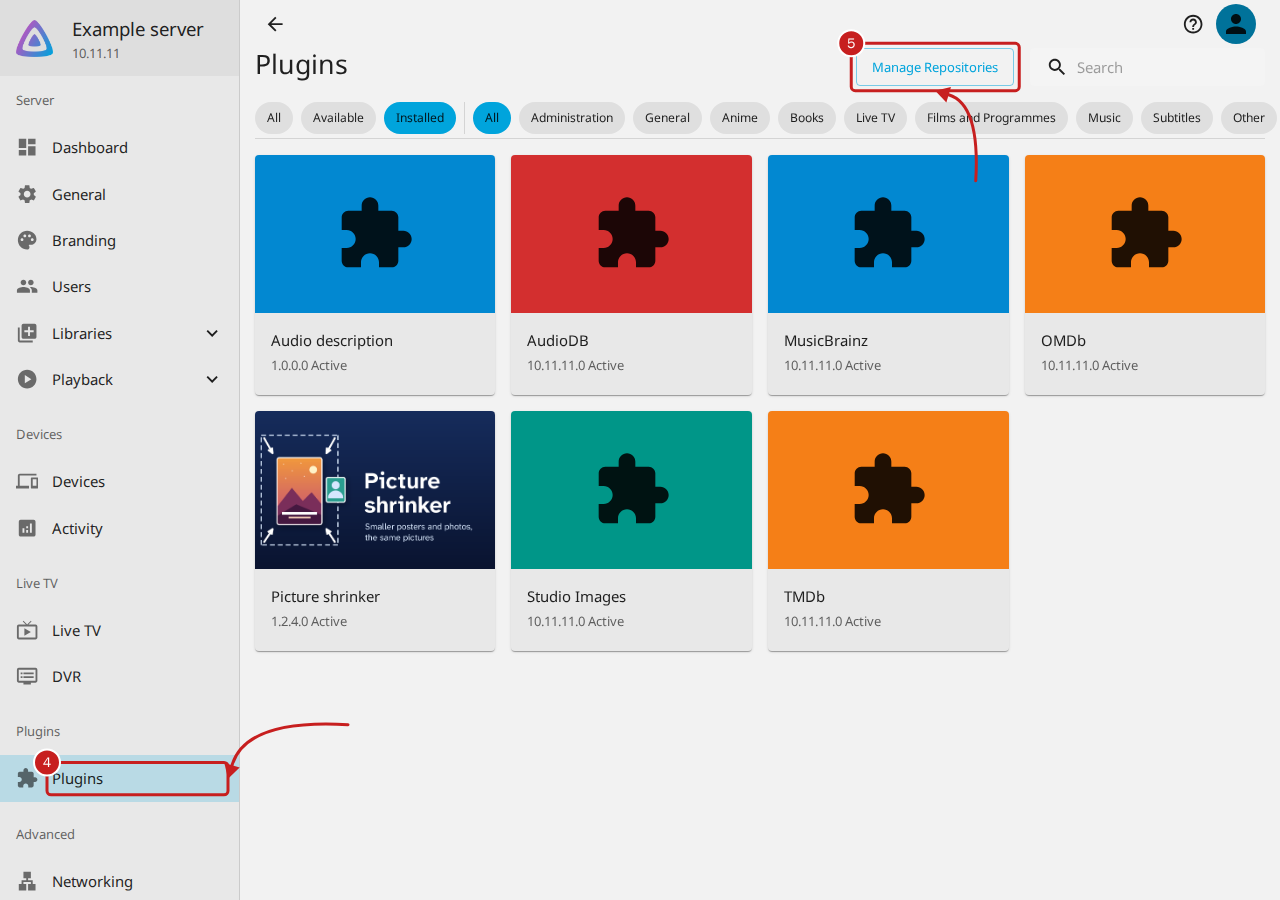
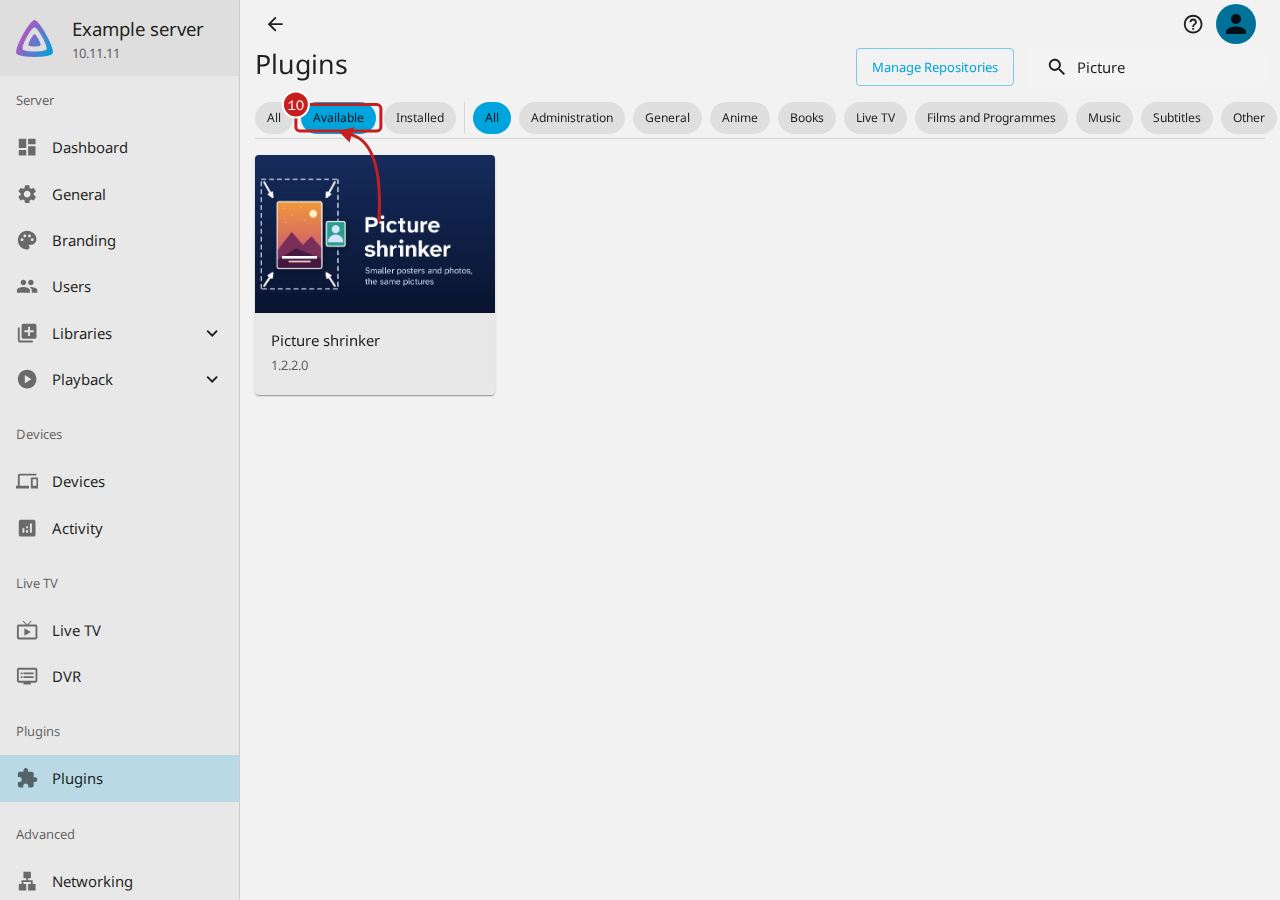
If your Plugins page has tabs instead, use these names:
| Step | Jellyfin 12 and 10.11.11 | A Plugins page with tabs |
|---|---|---|
| 5 | Manage Repositories | The Repositories tab |
| 6 | New Repository | + |
| 9 | Add | Save |
| 10 | Available | The Catalogue tab |
Things to note
- Each plug-in has two builds, one for Jellyfin 12 and one for Jellyfin 10.11. Jellyfin installs the one for its own version, so the catalogue shows a different version number on each.
- Jellyfin reads the repository again each time it checks for updates, so new versions appear by themselves.
- You need Starboard for neither plug-in. If you use Starboard, read Use the plug-ins with Starboard.
If it does not work
If the plug-ins are not in Available, read A plug-in is not in Jellyfin's catalogue.
Find out more
This page on GitHub, where the help is written.