On this page
How-to
Add an app
Add an app by giving Starboard its name, its address and, for most apps, its API key. The app then has a card on the Apps page with its status. Apps that Starboard installed are added for you; this is for an app you run yourself, such as Jellyfin on another computer.
Before you begin
- The app is installed and running. If you have no apps yet, read Install apps with Starboard.
- You know the app's port, such as 8096 for Jellyfin. Read Addresses and ports if ports are new to you.
- You have the app's API key to hand. Read Find an app's API key.
Tip: if the app is on the same computer as Starboard, Search for apps already on your server can find it and fill in these details.
Steps
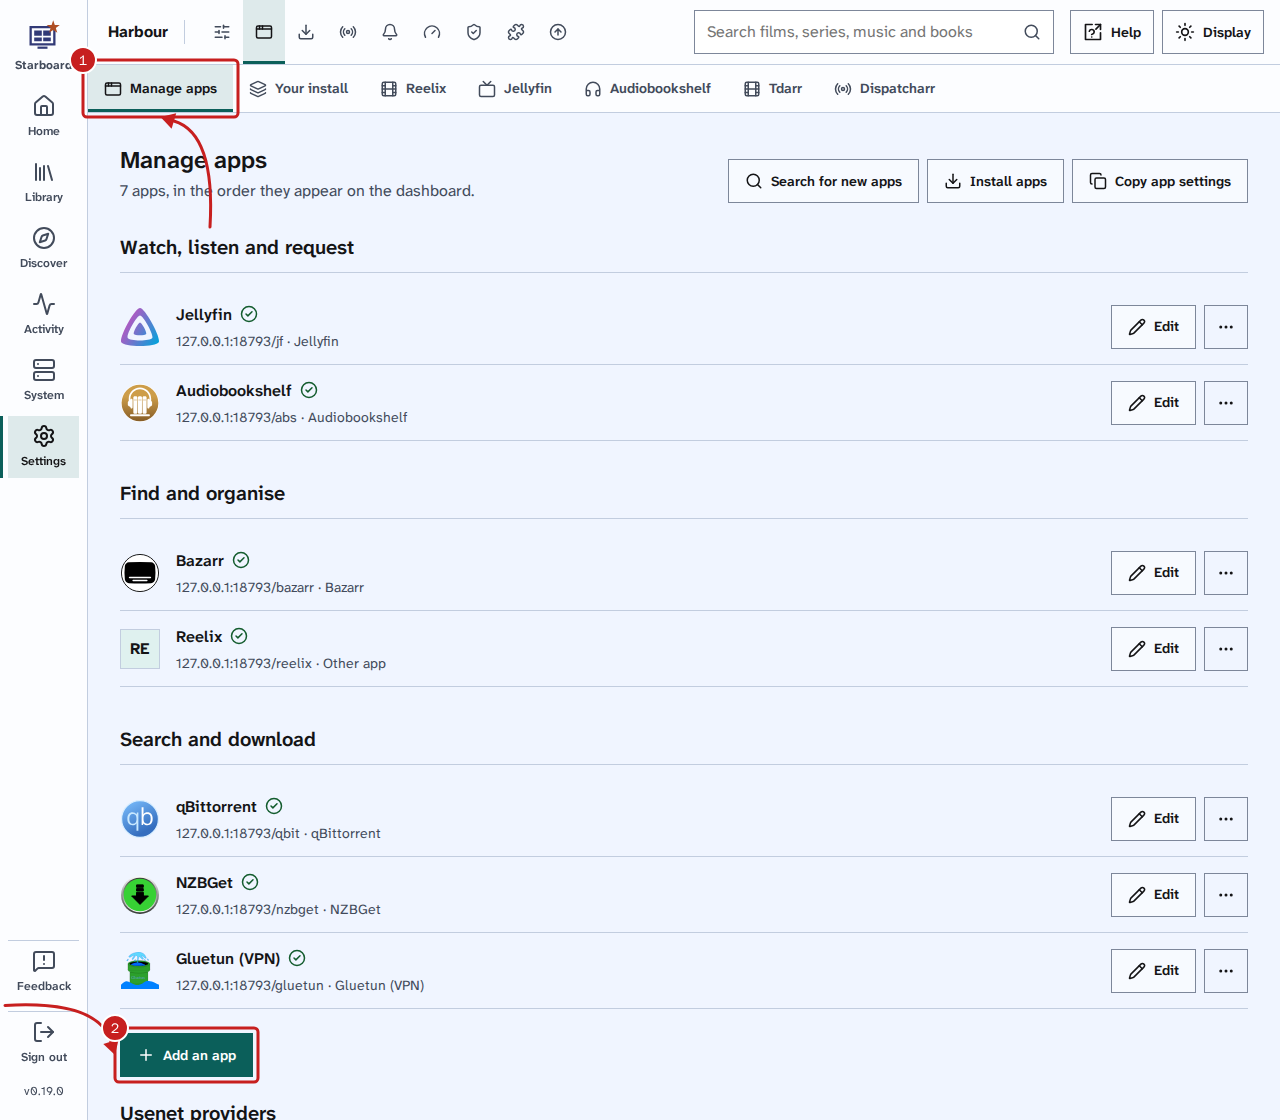
- Go to Settings, then Apps, then Manage apps.
- Select Add an app. A side panel called Add an app opens.
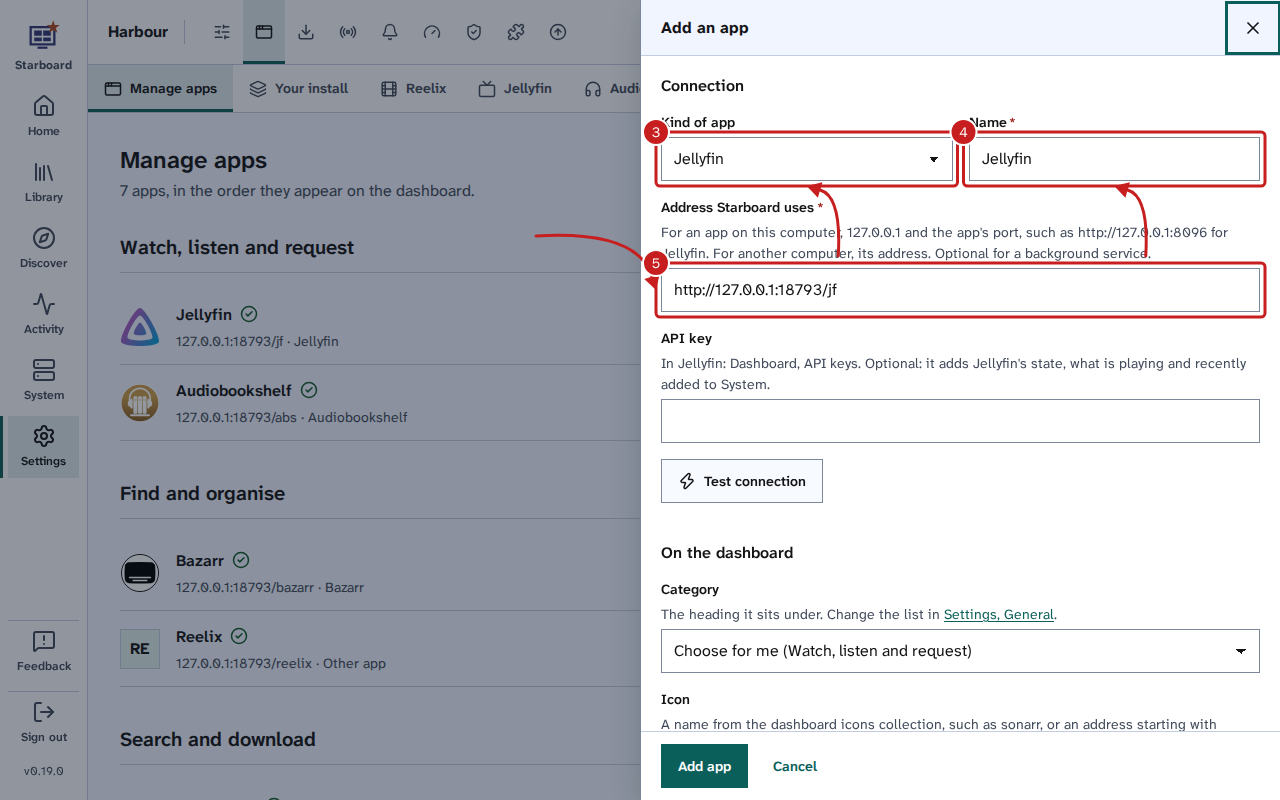
- In Kind of app, choose the app, such as Jellyfin. For an app that is not in the list, choose Other app.
- In Name, enter the name for its card, such as
Jellyfin. - In Address Starboard uses, enter the address with
http://and the port. For an app on the same computer as Starboard, use127.0.0.1, such ashttp://127.0.0.1:8096for Jellyfin. For an app on another computer, use that computer's address, such ashttp://192.168.1.20:8096.
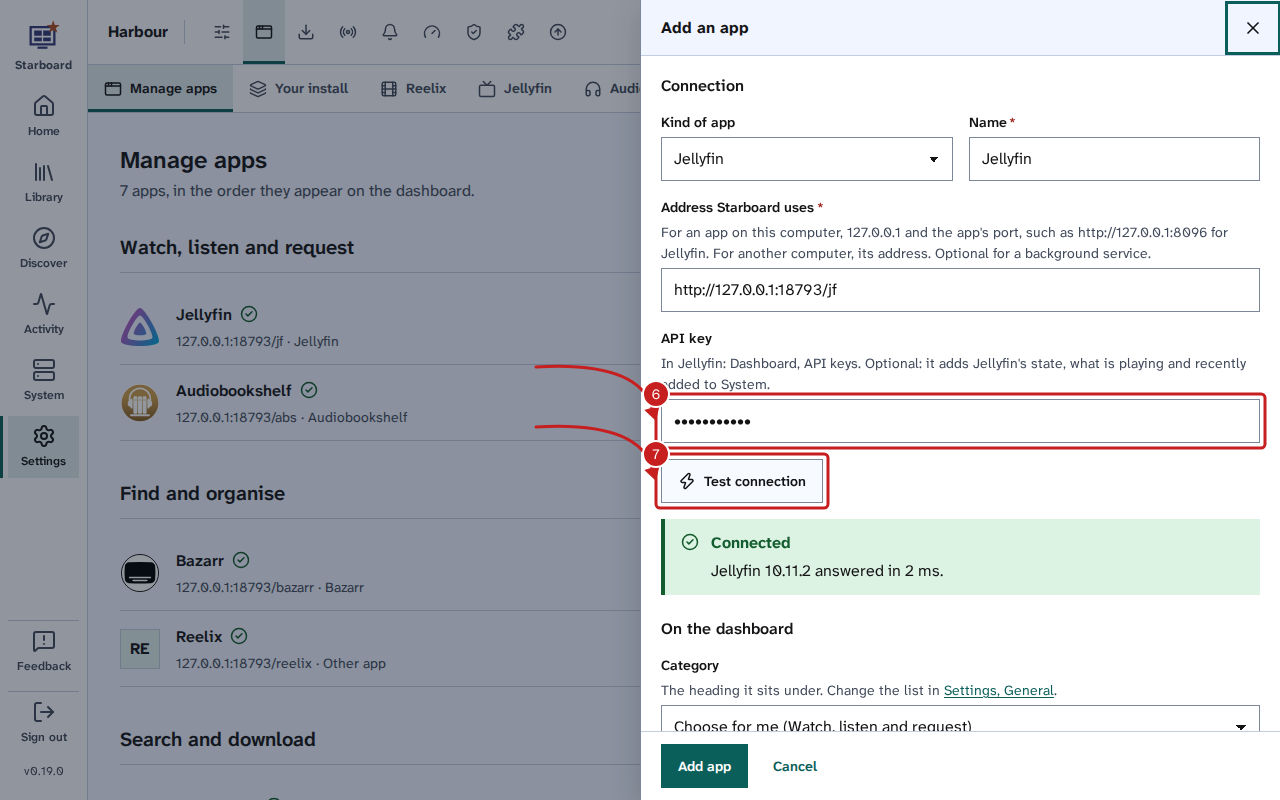
- In API key, paste the app's API key. The hint under the field says where that app keeps it. Other app has no API key field.
- Select Test connection. Starboard shows Connected and the app's version when the address and key are right.
- Optional: under On the dashboard, choose a Category and an Icon. Read Organise apps into categories and Change an app's icon.
- Select Add app.
Apps from an existing set-up: Sonarr, Radarr, Lidarr and Readarr
A new install has Reelix in place of these apps. If you run them already, Starboard searches them from the Search page too. For these four, the last button is Save and continue, and the panel moves on to Adding options. Starboard uses these choices when you add a film, series, album or book from the Search page.
- In Quality profile, choose the profile to use. The list comes from the app itself.
- In Folder, choose the folder new items go in.
- For Lidarr and Readarr, choose a Metadata profile.
- Keep Search as soon as something is added active if you want the app to search for it straight away.
- Select Save adding options. To choose later, select Skip for now: Starboard then uses the first in each list.
Things to note
- Docker container names, such as
http://jellyfin:8096, usually do not work, because Starboard uses the computer's own network. Use127.0.0.1and the port instead. - Starboard keeps API keys on the server and never sends them to your browser. When you edit an app later, API key is empty: leave it empty to keep the saved key.
- An app saved with
127.0.0.1still opens from a phone, because Starboard swaps in the address you opened Starboard with. To use another address, fill in Address to open in your browser. - Outside address is optional. It is for an address that works away from home, such as your own domain.
- An app with no web page of its own, such as a VPN (virtual private network), is a background service. Read Add a background service.
If it does not work
- Cannot connect: check the port, and that the address starts with
http://. Open the address in a browser on the server to check the app is running. - The address must start with http:// or https://: add
http://to the start of the address. - Starboard does not call and the address: Starboard refuses link-local addresses (they start with
169.254) and cloud metadata addresses, because no media app uses them. Use the app's address on your home network instead. - The key is refused: copy the API key again from the app. Read Find an app's API key.
- Could not load the profiles and folders: the app did not send its lists. Select Skip for now, check the app is running, then edit the app again.
Find out more
This page on GitHub, where the help is written.