How-to
Make an API key and use Starboard's API
Starboard's API lets other apps, scripts and AI assistants read what Starboard knows, such as your apps' status and what is downloading. A key reads, or reads and manages: approves requests, pauses downloads and the like. No key can change Starboard's settings. Make one key for each app that uses it.
Before you begin
- Have your Starboard password ready.
- Know where the key will be used, such as Home Assistant, so you can name the key after it.
Steps
Make a key
- Go to Settings, then Security, then API keys.
- Select Make a key. A slide-out opens.
- In Name it after what will use it, enter a name, such as
Home Assistant. - In What it may do, choose Read only, or Read and manage if it must act, such as approving requests.
- In What it may read, tick only the areas it needs. Leave them all empty for everything except Logs and Updates, which a key has only when they are ticked. Updates with Read and manage lets it update Starboard, Reelix, your apps and plug-ins, and roll a plug-in back, as the pages do.
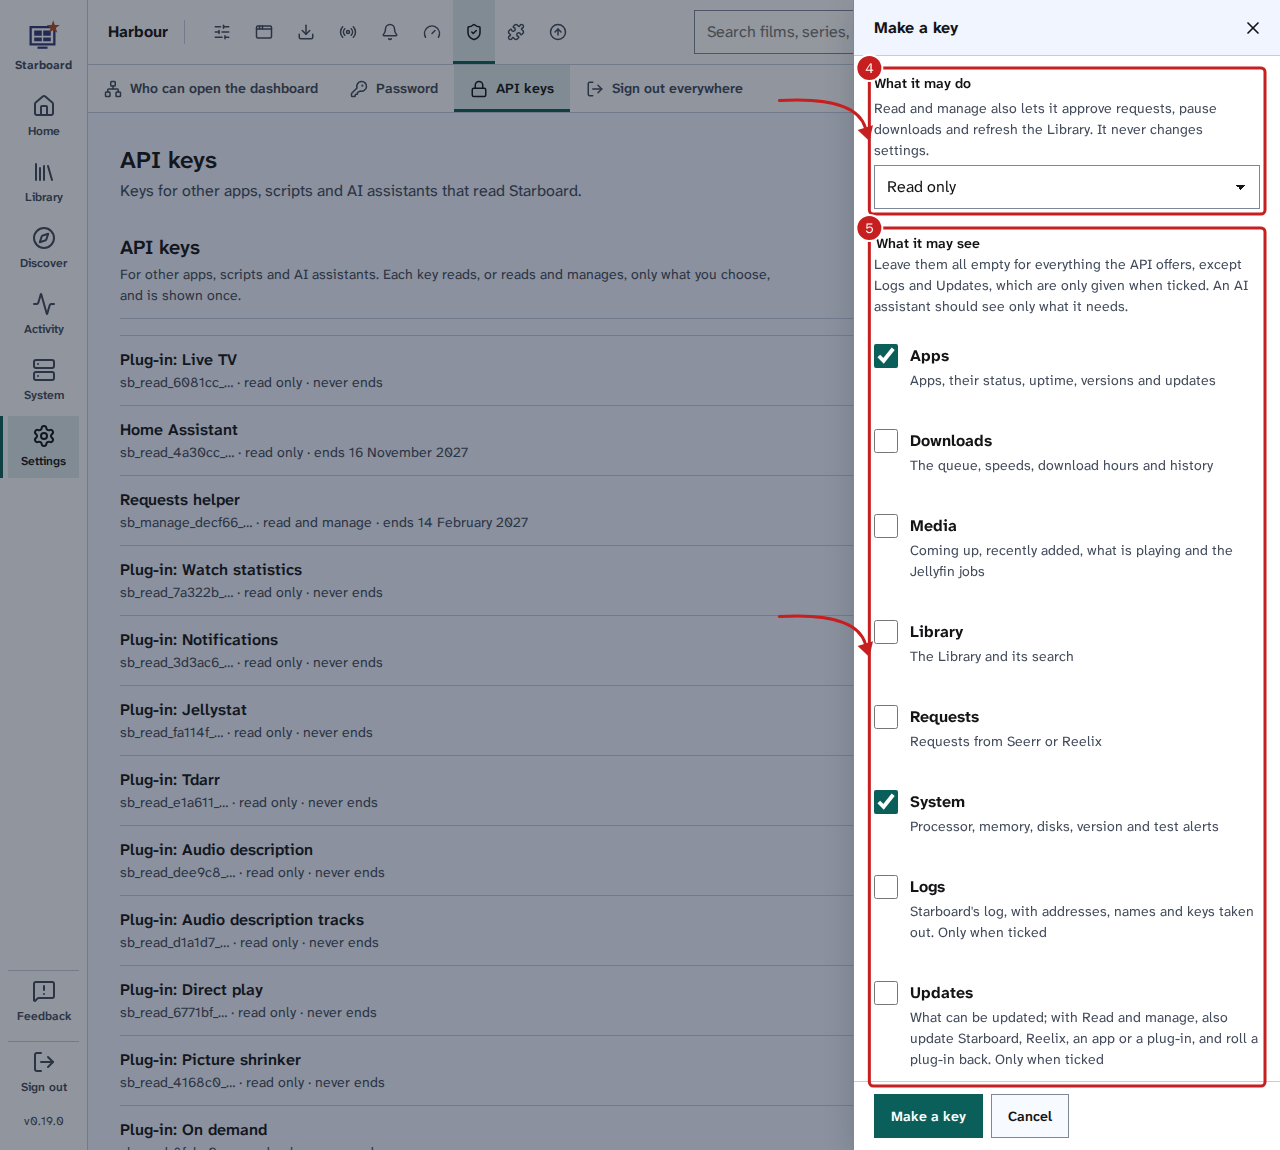
- In Ends, choose In 90 days, In a year or Never.
- In Your Starboard password, enter the password.
- Select Make a key.
- Select Copy, then paste the key into the app that will use it. Starboard shows the key only this once. Select Done.
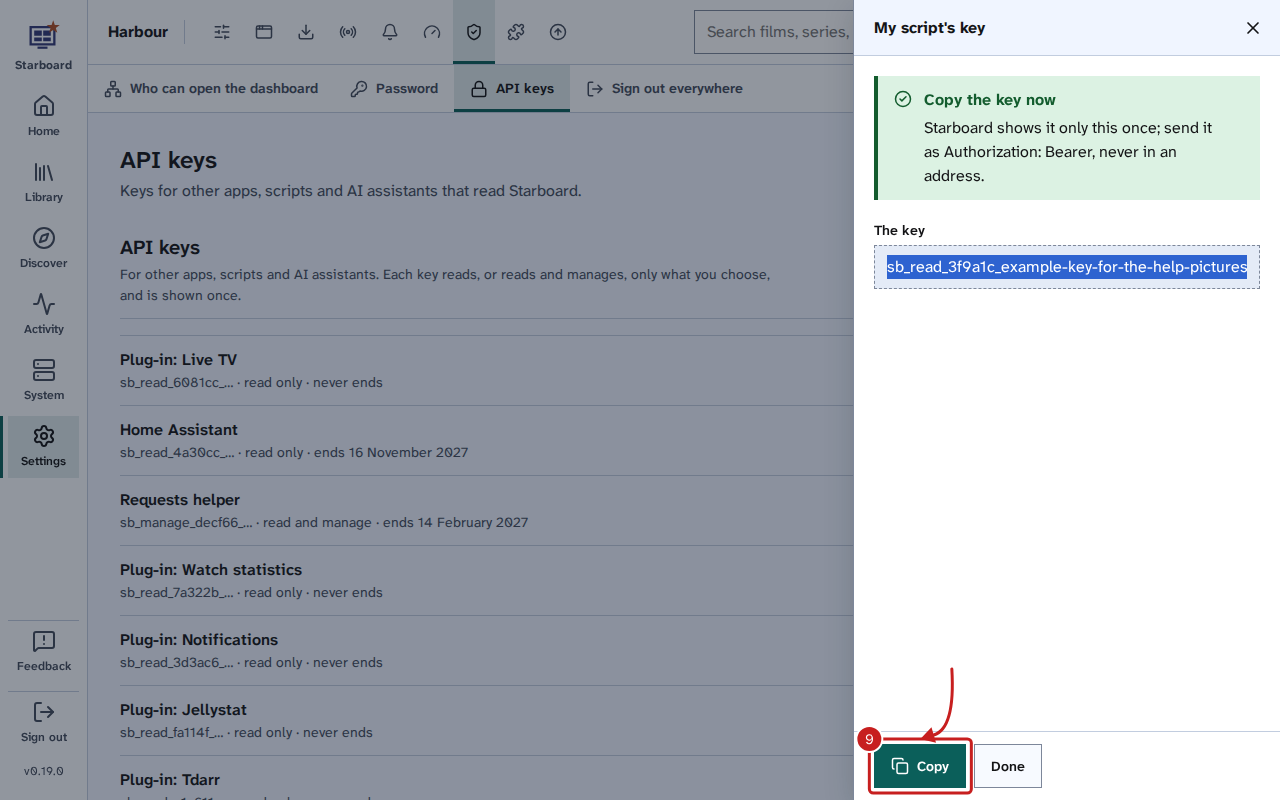
The key appears in the list with its name, the start of the key, what it may do, when it ends and whether it has been used.
Use the key
Send the key in the Authorization header, as Bearer and then the key. For example, from the server:
curl -H "Authorization: Bearer sb_read_..." http://127.0.0.1:8095/api/v1/statusEvery address starts with /api/v1. A key reads your apps and their status, problems the apps report,
downloads, Coming up, requests, the Library, recently added media, what is playing in Jellyfin, and the server's
processor, memory and disks, within the areas you ticked.
Revoke a key
- Go to Settings, then Security, then API keys.
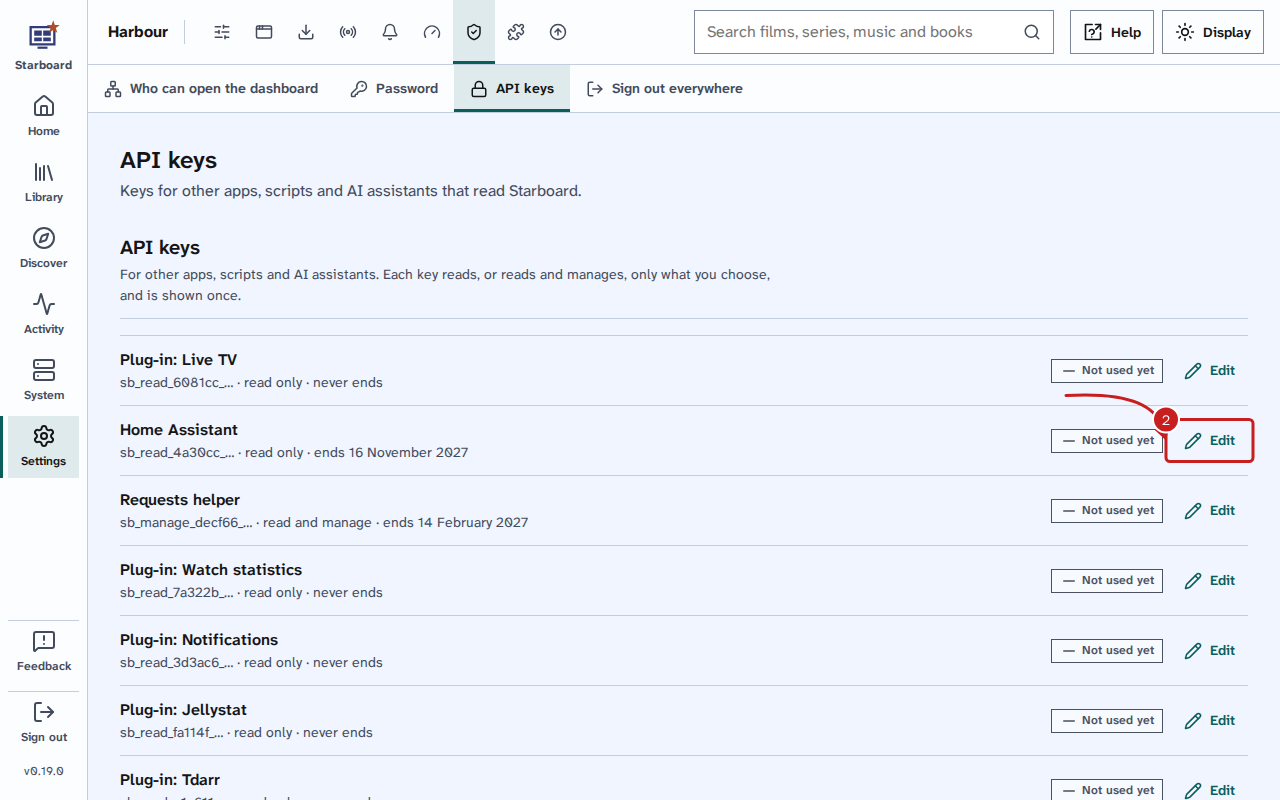
- Select Edit beside the key.
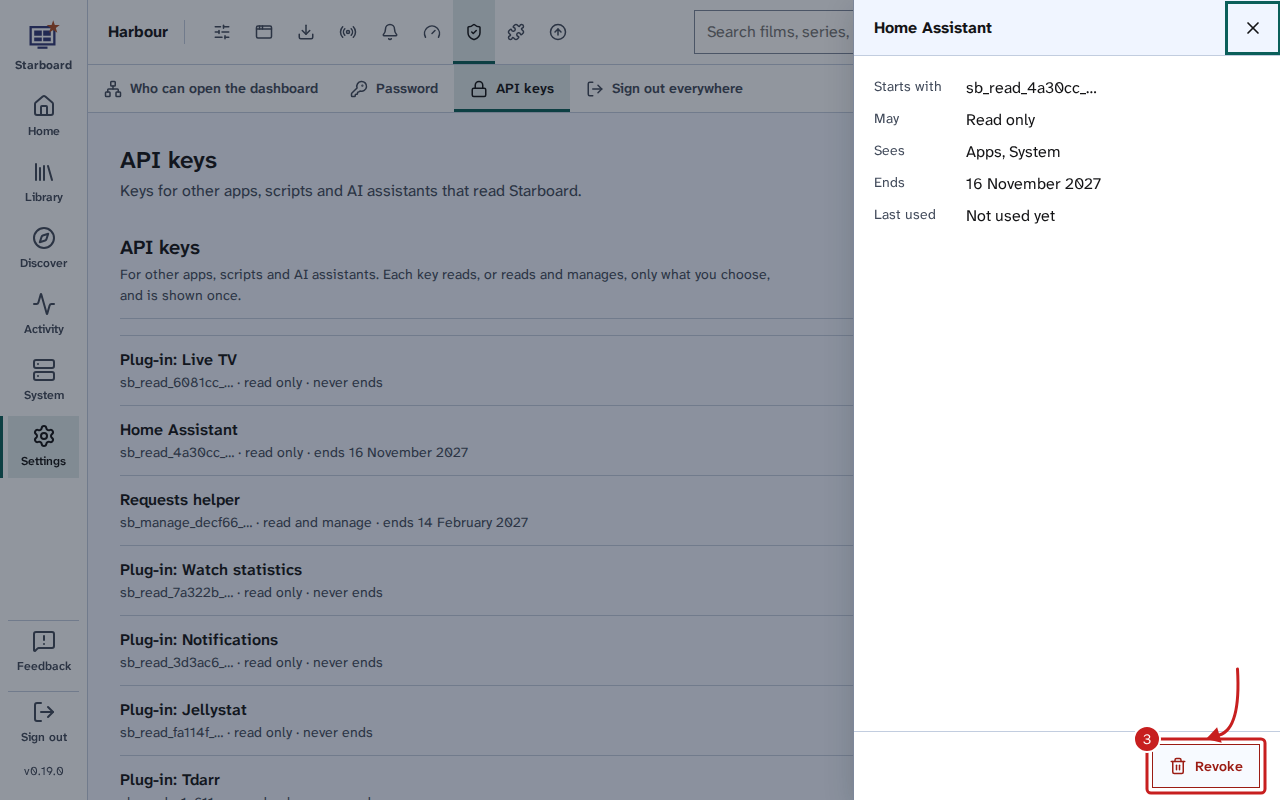
- The slide-out shows what the key May do, what it Reads and when it ends. Select Revoke, then Revoke again to confirm. Anything using the key stops working at once.
Things to note
- The full list of what the API offers is in the API description (OpenAPI), under API keys. It is also
at
/api/v1/openapi.jsonon your Starboard. - A key in the address is refused. Send it only in the header.
- Each key can make up to 120 requests a minute.
- Changing the password or signing out everywhere does not stop a key. Revoke it.
- No key can change network access, the sign-in cookie, how long sign-ins last or where alerts go. Read How Starboard keeps your server safe.
If it does not work
- key_needed: the key is missing, wrong, revoked or past its end date. Make a new key.
- too_many_attempts: too many wrong keys came from that address. Wait 15 minutes.
- rate_limited: more than 120 requests in a minute. Wait the seconds the answer gives.
- The list of API errors explains each one.
Find out more
This page on GitHub, where the help is written.